Cloud Run 是無狀態的,
代表它的容器重啟之後,
容器裡面的 Log 全部消失不見,徹底的無狀態。
那我們如果想要除錯,只能看到 Cloud Run 本身的 Log,
怕資訊不足,怎麼辦?
你又不能直接連進去 Container,
因為它又是「無伺服器」的,根本不能連到它 Command Line。
怎麼辦呢?
其實它是可以設定輸出 Log 的位置的,
這裡做一個簡單的範例給大家參考~
我先在 Cloud Shel l 開一個目錄
mkdir nginx
cd nginx
mkdir write-to-logging
cd write-to-logging

在資料夾裡建立3個檔案,各位直接複製貼上就好了:
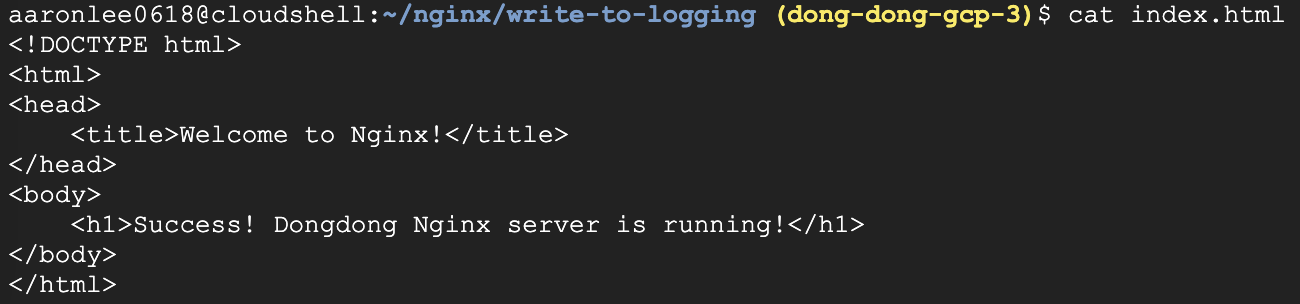
第一個 index.html 首頁檔案
vim index.html
<!DOCTYPE html>
<html>
<head>
    <title>Welcome to Nginx!</title>
</head>
<body>
    <h1>Success! Dongdong Nginx server is running!</h1>
</body>
</html>
截圖
第二個是 Nginx 的設定檔
vim nginx.conf
重點是設定 Nginx 把日志寫到 stdout 和 stderr,
然後讓 Cloud Run 自動收集這些 Log 並傳送到 Cloud Logging。
worker_processes  1;

events {
    worker_connections  1024;
}

http {
    include       mime.types;
    default_type  application/octet-stream;
    sendfile        on;
    keepalive_timeout  65;

    access_log /dev/stdout;
    error_log /dev/stderr;

    server {
        listen       8080;
        server_name  localhost;

        location / {
            root   /usr/share/nginx/html;
            index  index.html index.htm;
        }

        error_page   500 502 503 504  /50x.html;
        location = /50x.html {
            root   /usr/share/nginx/html;
        }
    }
}
截圖

第三個是 Dockerfile
vim Dockerfile
# Use the official Nginx image from the Docker Hub
FROM nginx:latest

# Copy the Nginx configuration file
COPY nginx.conf /etc/nginx/nginx.conf

# Copy the index.html file to the default Nginx directory
COPY index.html /usr/share/nginx/html/index.html

# Expose the port that Cloud Run will use
EXPOSE 8080

# Start Nginx when the container launches
CMD ["nginx", "-g", "daemon off;"]
我在自己專案的 Artifact Registry 建立 Repository 為 nginx

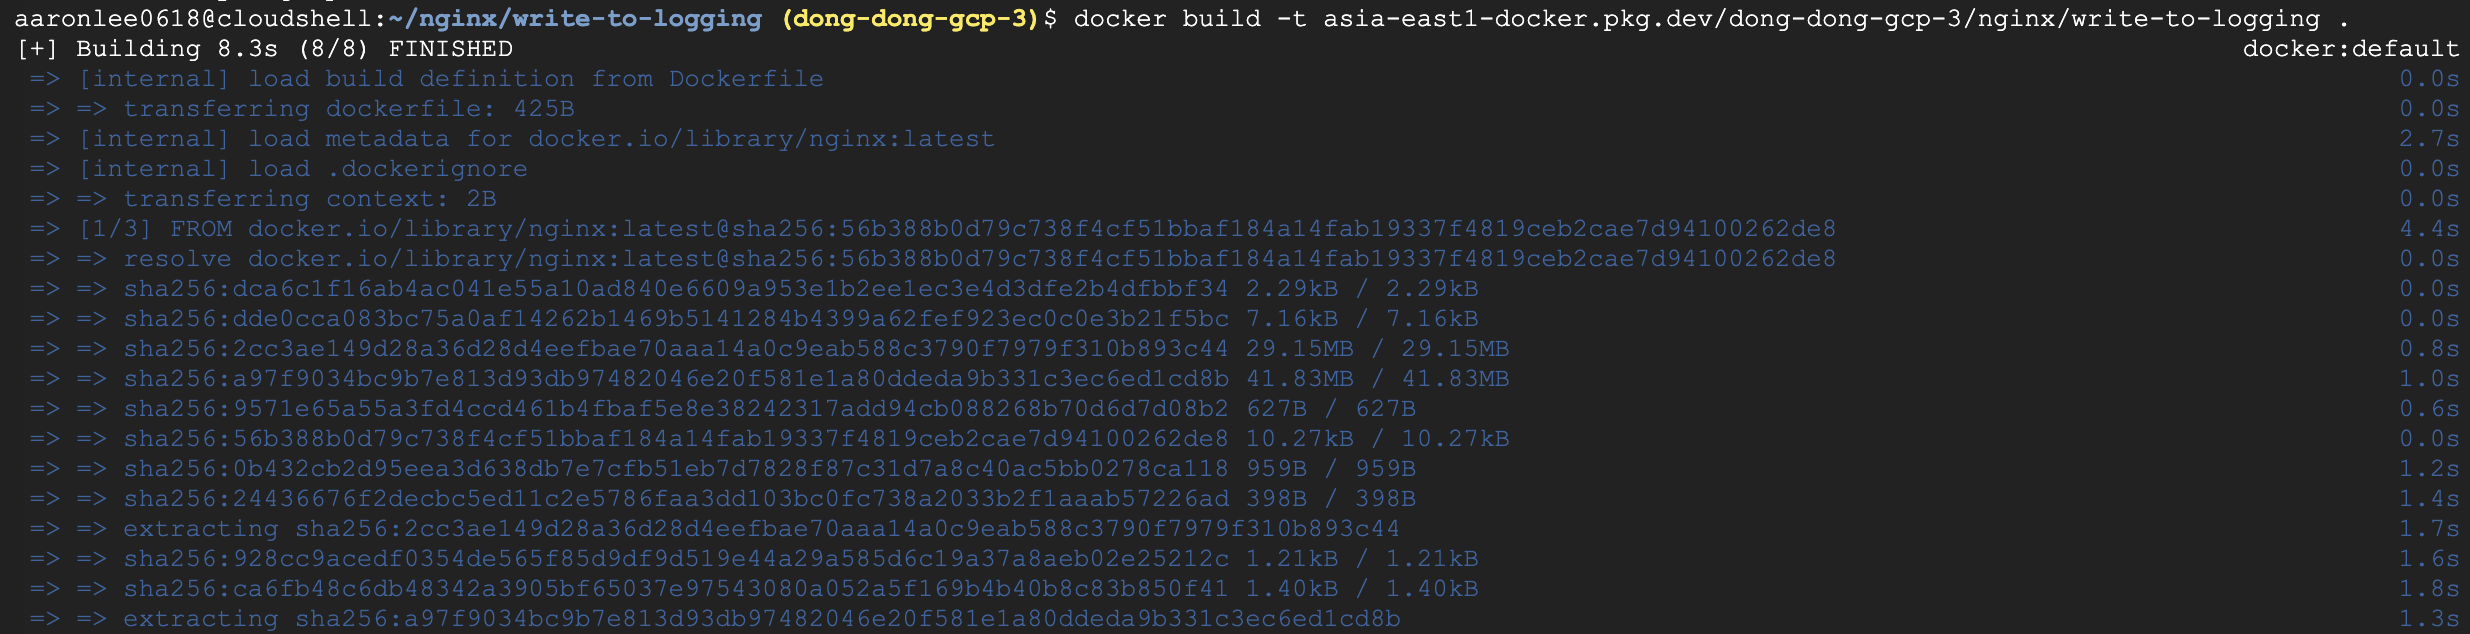
然後在 Cloud Shel l 建立 Docker Image 名字叫 write-to-logging
(dong-dong-gcp-3 請改成你的專案 ID 喔)
(注意下面指令有一個句號喔)
docker build -t asia-east1-docker.pkg.dev/dong-dong-gcp-3/nginx/write-to-logging .
接下來就把 Image Push 到 Artifact Registry
docker push asia-east1-docker.pkg.dev/dong-dong-gcp-3/nginx/write-to-logging

接下來就看到 nginx 這個 repo 有一個新的 Image

如果都沒問題的話,就可以部署到 Cloud Run,
如果懶得在 Console 上點,可以直接複製下面的指令 (記得改掉 Project ID 喔 ):
gcloud run deploy nginx-logging \
–image asia-east1-docker.pkg.dev/dong-dong-gcp-3/nginx/write-to-logging \
–platform managed \
–region asia-east1 \
–allow-unauthenticated

其實我本來就部署成功了,
但我再輸入部署指令時,它不會報錯,
只會幫我增加最新的版本,蠻貼心的。
接下來看一下 Cloud Run 的 Console:
那個 nginx-logging 就是我剛部署的服務,點 “nginx-logging” 看看

再點開它的超連結
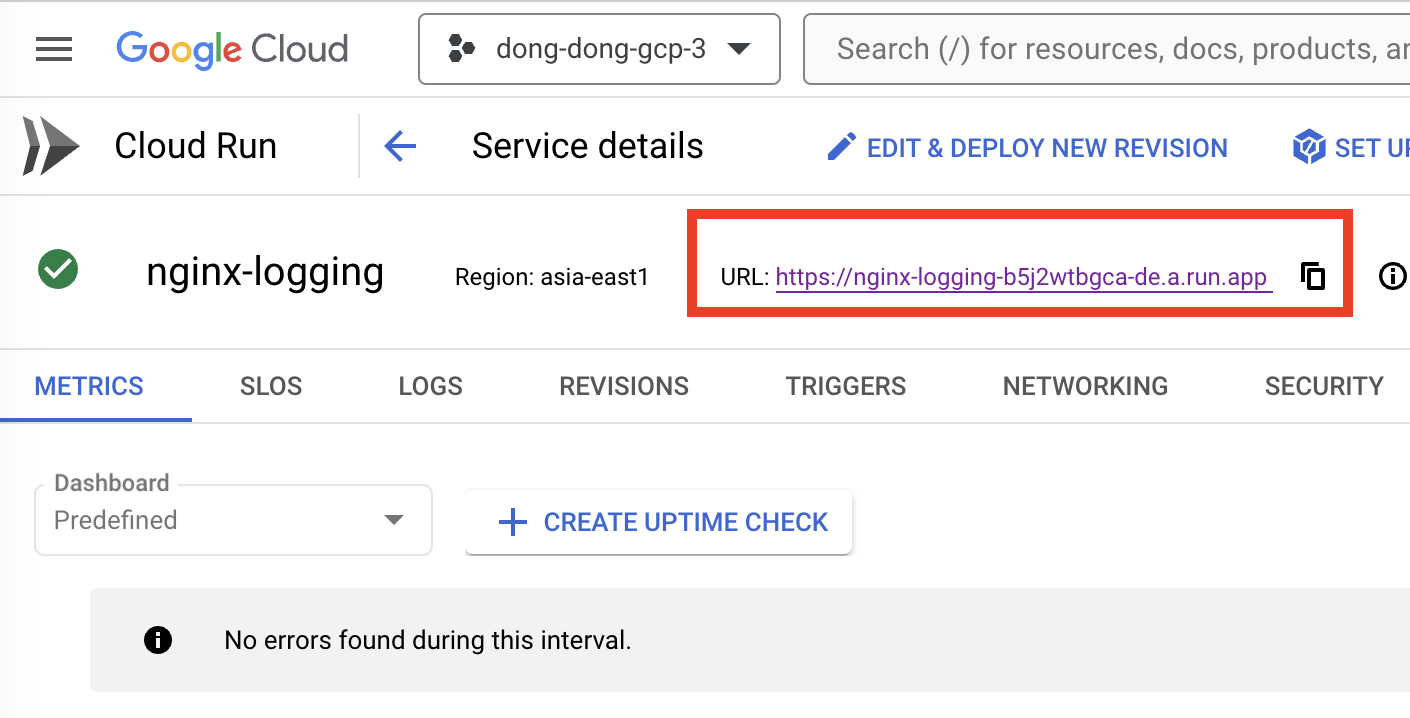
會看到
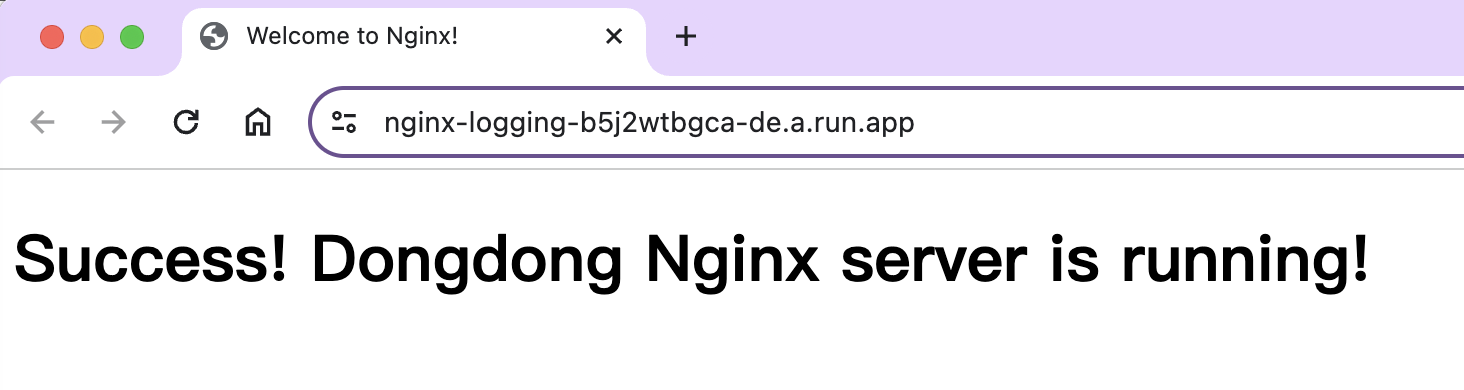
代表部署成功了!
那要怎麼證明,它的 Log 有寫入 Cloud Logging 呢?
我們先故意在網址列尾巴增加 “?” 和其他英文數字

然後按 Enter,它顯示畫面是不變的,
但是這個網址會記錄到 Nginx 的 Log 裡面。

你可以點開它的 Log 查看

你會在左邊的 Log 欄位看到有 stdout 和 stderr 的選項,點擊篩選:
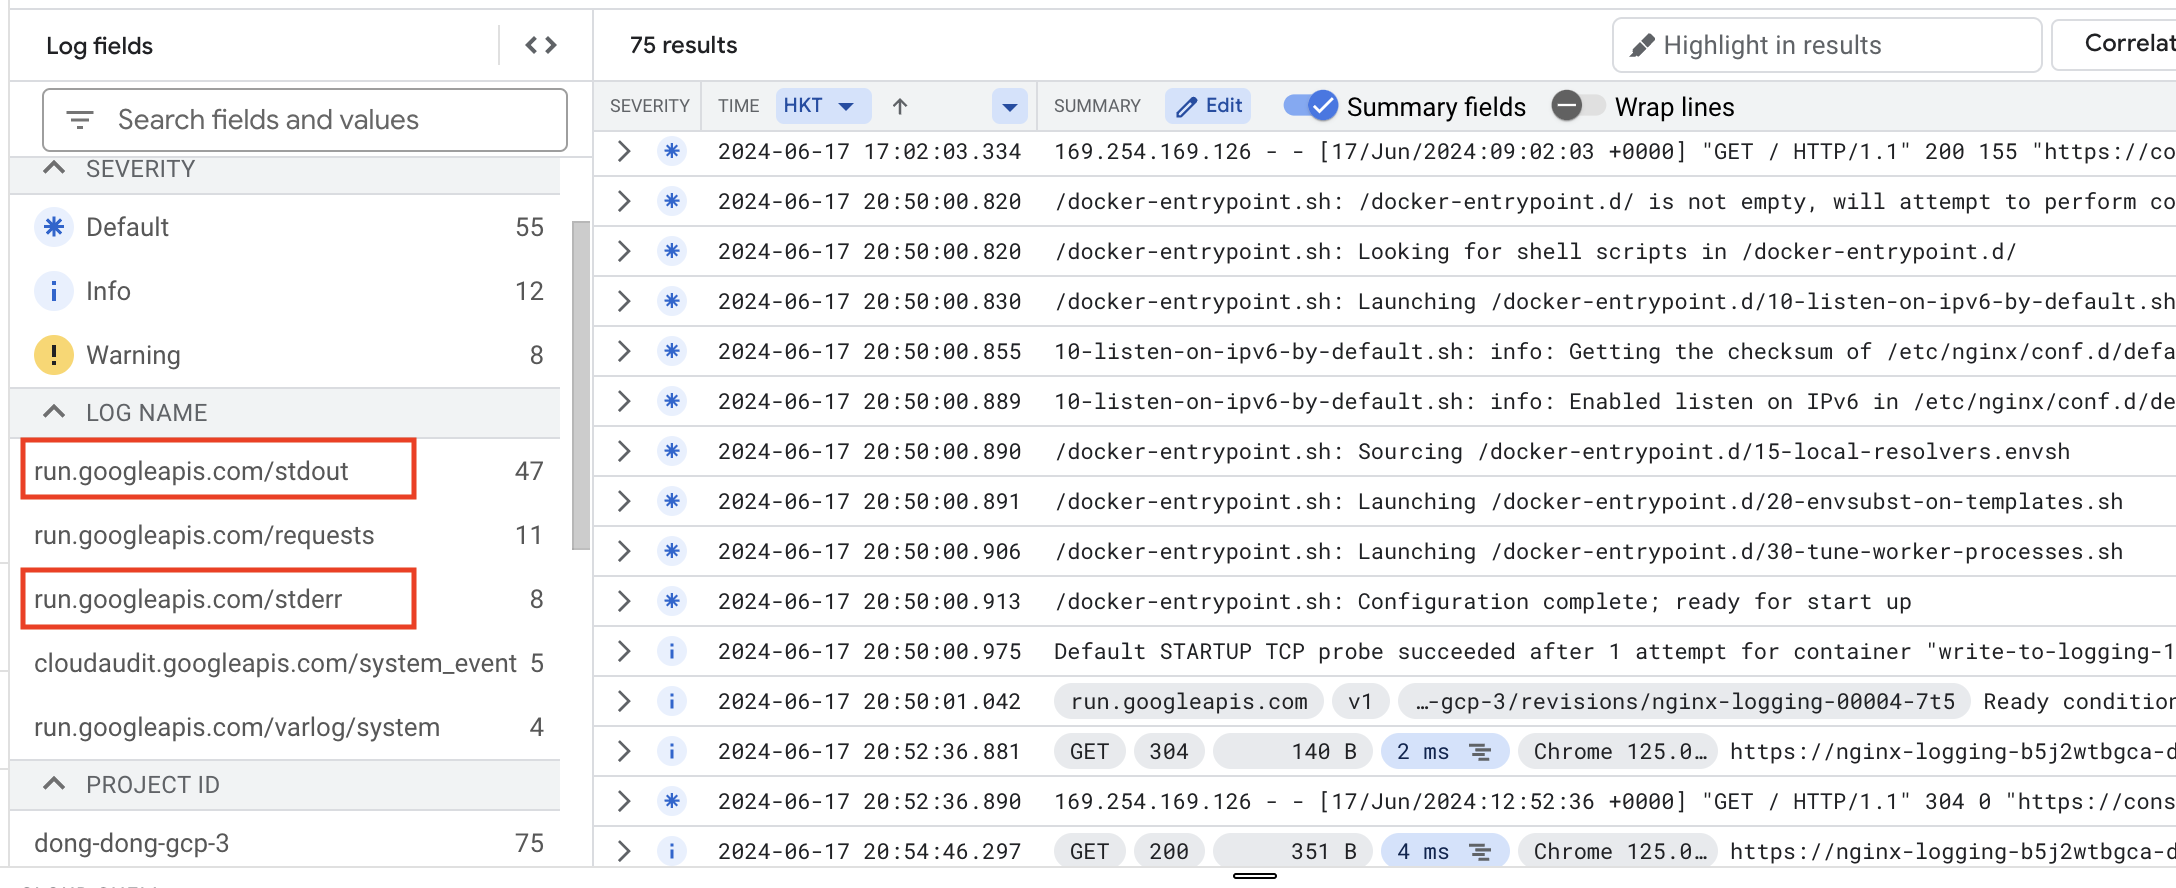
就可以看到 Nginx Container 寫到 Cloud Logging 的 Log 了!
現在看到是長這樣,這些都是 Cloud Run 本身沒有記錄的 Log 喔!

如果把篩選器移除,才會同時看到 Cloud Run 和 Nginx 本身收集到的 Log:

今天就簡單分享到這裡,謝謝大家!